How to Create a New Author Profile in PublishPress Authors
Table of Contents
Introduction
In this guide, you’ll learn how to create a new author profile in PublishPress Authors. This plugin lets you build detailed author profiles and display them on posts — ideal for multi-author sites where readers want to know more about the people behind the content.
This article explains how caSite users can create a new author profile for a user who already has a WordPress account on your site. The process is quick and handled entirely from the Authors screen in your WordPress dashboard.
Step 1: Open the Authors Screen in PublishPress Authors
- Log in to your WordPress dashboard.
- In the left-hand menu, click Authors.
- The Authors screen will open with a New Author Profile form at the top.
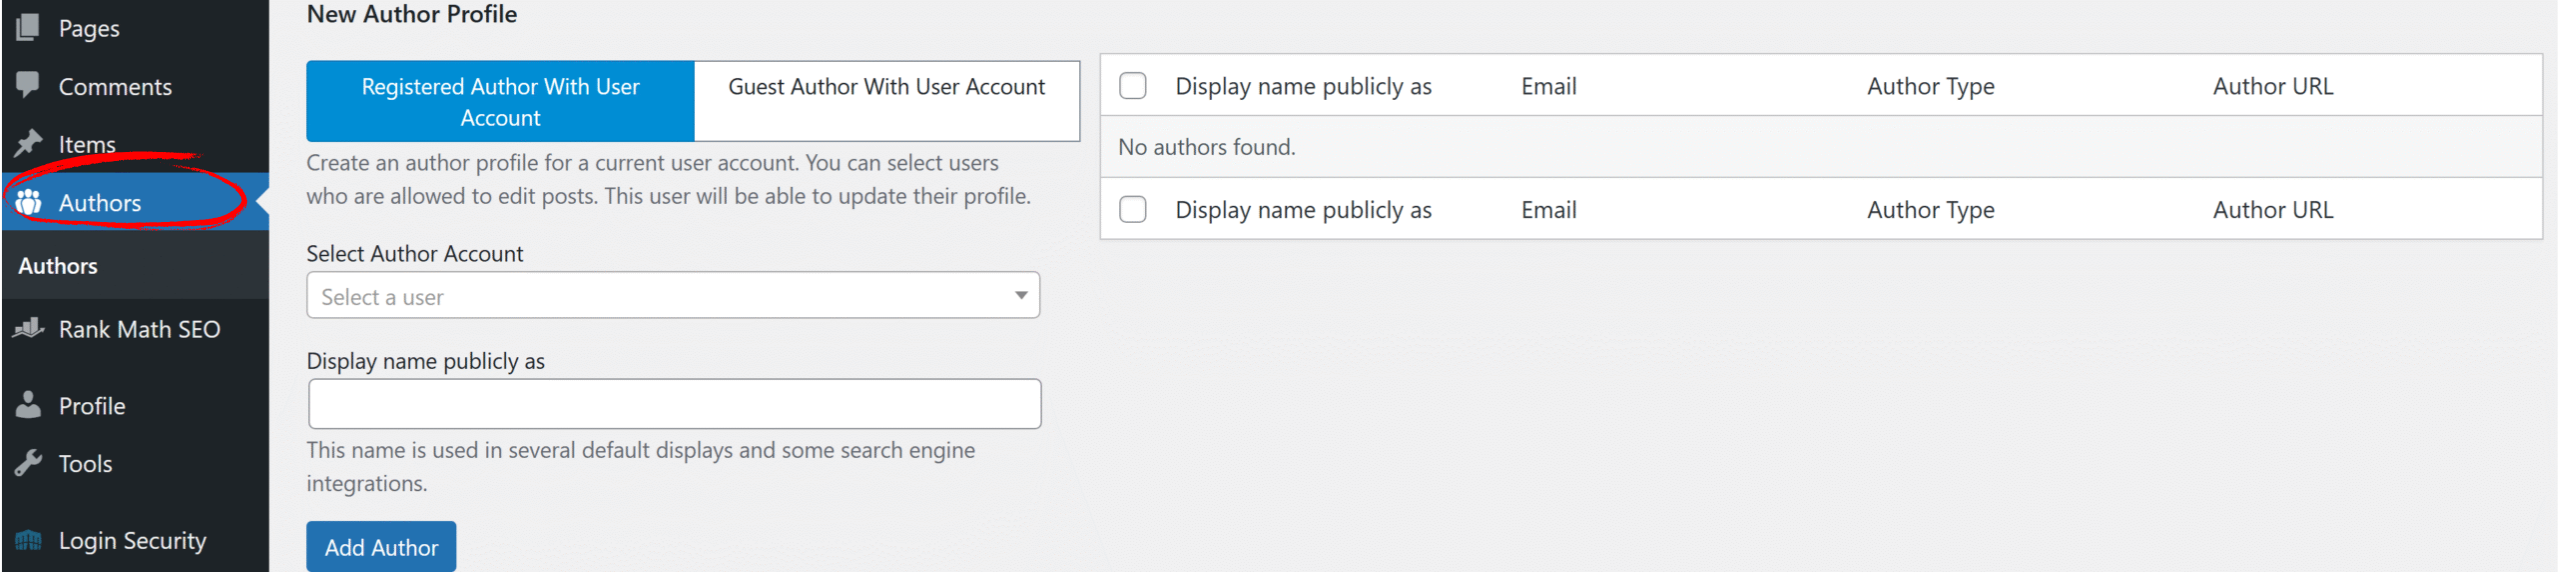
Step 2: Choose “Registered Author With User Account”
- Make sure Registered Author With User Account is selected in the profile type options.
- This links the author profile to an existing WordPress user.
Step 3: Select the User Account
- In the Select Author Account dropdown, choose the user you want to create a profile for.
- The Author Name field will appear, pre-filled with the user’s name.
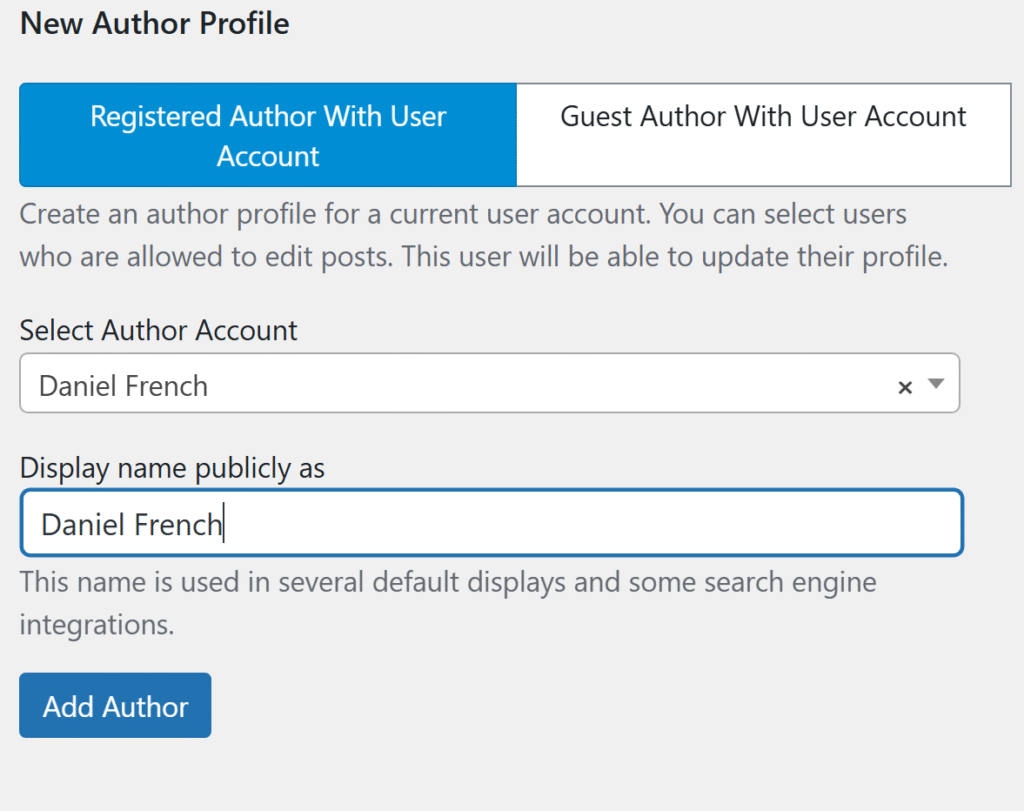
Step 4: Save the Profile
- Click Add Author.
- The Authors list will update with the new profile included.

Next Steps
Once you create a new author profile in PublishPress Authors, you can edit its details — such as bio, profile image, and other public information — in the Author Profile screen. For instructions, see the next article: Editing an Author Profile in PublishPress Authors.